Mastering Bow Drawing: Art, Archery, And Beyond
Have you ever been captivated by the elegant simplicity of a perfectly tied ribbon or the powerful grace of an archer drawing their bow? The phrase "bow drawing" encompasses a surprisingly broad spectrum, from the delicate artistry of rendering a decorative knot on paper to the precise, athletic action of preparing an arrow for flight. Whether you're an aspiring artist looking to add charm to your creations or an archery enthusiast seeking to perfect your form, understanding the nuances of bow drawing is a rewarding journey. This comprehensive guide will delve into both facets, providing you with expert insights, step-by-step instructions, and valuable tips to elevate your skills.
From whimsical sketches for gifts and decorations to the foundational mechanics of archery, the ability to effectively engage in bow drawing is a versatile skill. We'll explore how to bring various styles of bows to life on paper, emphasizing easy steps and practical tips for beginners and seasoned artists alike. Beyond the canvas, we'll also examine the critical physical techniques involved in drawing an archery bow, highlighting the importance of form, efficiency, and accuracy. Prepare to unlock the secrets behind creating stunning visual representations and mastering the physical discipline of the draw.
Table of Contents
The Art of Decorative Bow Drawing
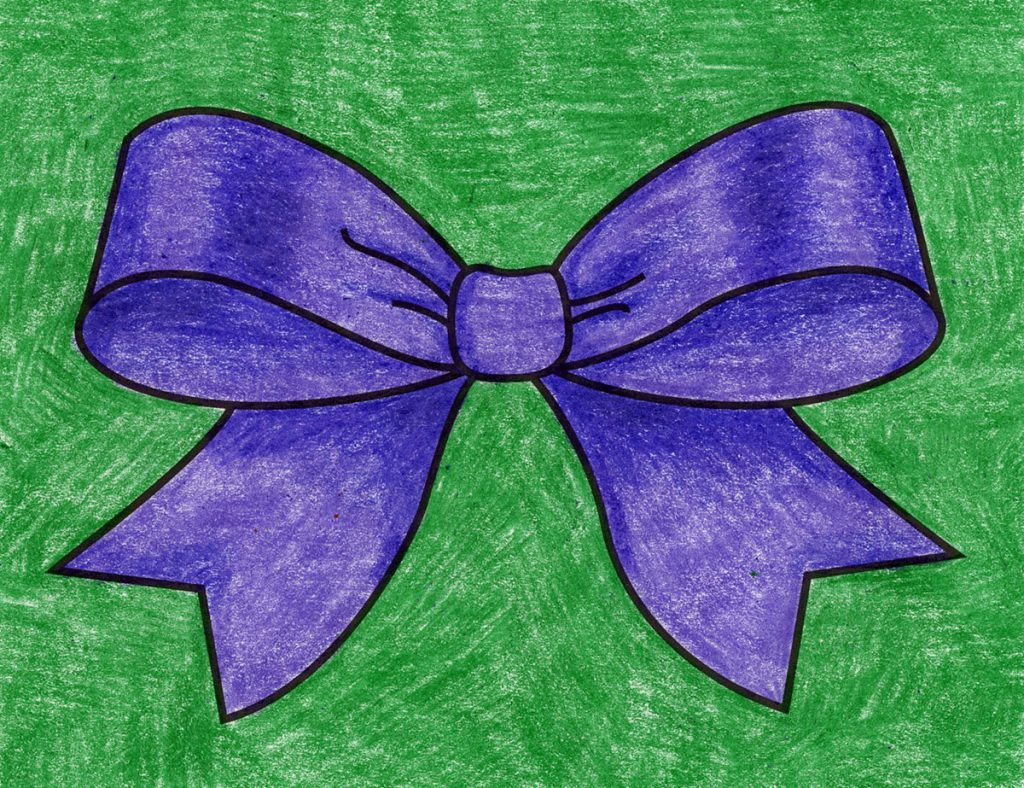
As an artist, few subjects offer as much playful versatility as the humble bow. From the simple elegance of a ribbon tied around a gift to the intricate folds of a formal bow tie, decorative bow drawing allows you to experiment with different shapes, lines, and sizes. It’s a super fun exercise in understanding curves, symmetry, and flow. This guide will show you how to draw a bow, teaching you all the cool tricks to make your drawing look super awesome, whether you want it to look real or super cool and fancy. We'll cover everything from basic outlines to adding color and outline to your drawings, ensuring you can create beautiful bows for clothing, decoration, or gifts.Getting Started: Your First Bow Sketch
For anyone eager to jump into the world of bow drawing, the key is to start simple. Grab a pencil and paper and follow along. This is a super easy drawing tutorial anyone can follow. We'll begin with the foundational elements that make up any bow, ensuring you build a strong understanding before moving to more complex designs.Simple Steps for Beginners
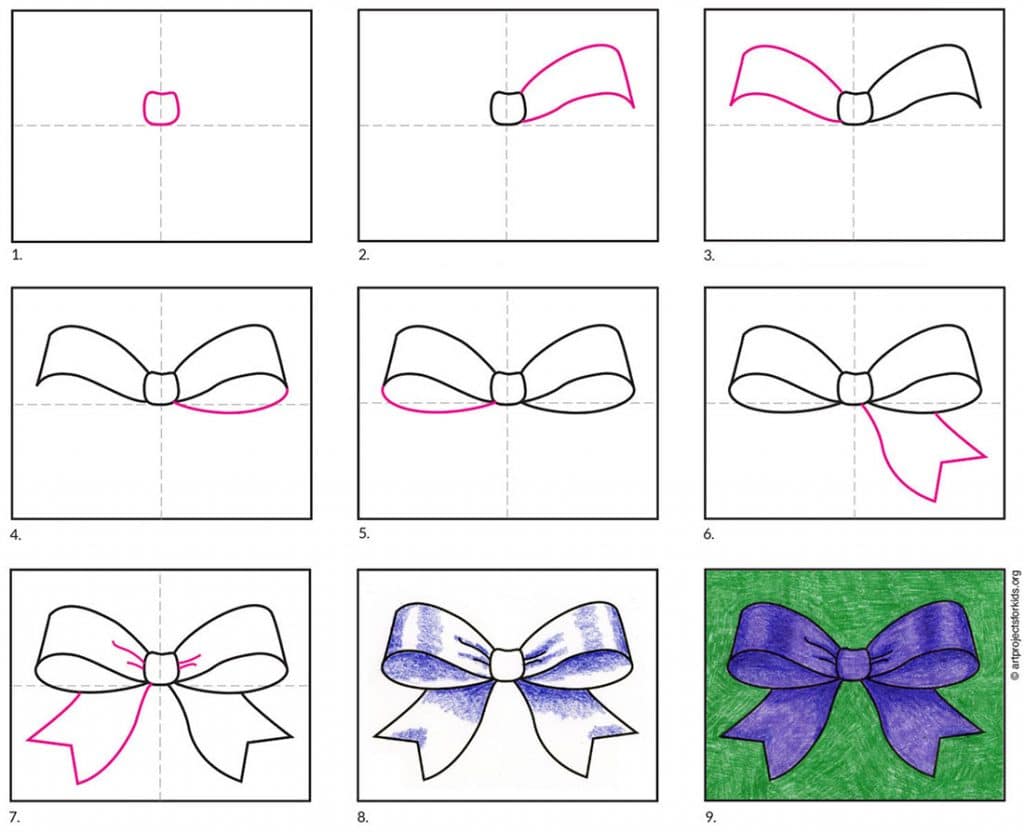
Learning how to draw a bow can be broken down into nine simple steps, making it accessible even for children. The foundation of good drawing starts with light, guiding lines. 1. **Mark Off the Width and Height:** Begin by lightly sketching a rectangle or square to define the overall space your bow will occupy. This helps with proportion. 2. **Draw a Guideline for the Bow:** Lightly draw a central horizontal line. This will be your guide for the bow's middle knot. 3. **Show General Proportions:** With light lines, sketch the general proportions of the bow loops and tails. Think of them as soft, rounded rectangles or triangles initially. 4. **Start Drawing the Middle of the Bow:** This is where the magic begins. To complete this step, you have to draw two similar short curved lines opposite each other. These lines will form the basic shape of the knot. 5. **Complete the Middle Knot:** Connect the ends of the previously drawn lines with curved lines, and add lines in the middle to give the knot volume. Imagine it as a slightly squashed oval. 6. **Draw the Top of the Loops:** For the right bow loop, move your pencil upward and outward from the knot's top right. This creates the top curve. 7. **Draw the Sides of the Loops:** Pull the line downward from the top curve to draw the side of the bow loop. Repeat for the left loop, aiming for symmetry. 8. **Bring the Line Back:** Finally, bring the line back to the bottom right corner of the bow knot, completing the loop. Do the same for the left side. 9. **Draw the Bottom Outline of the Bow Loops:** Add a subtle inner line following the curve of the loops to give them thickness and dimension. You can find and save ideas about bow drawing step by step on Pinterest for visual inspiration. Follow the step by step instructions and see the results of your first bow drawing on YouTube if you prefer video guides.Adding Flair: Color and Texture
Once you have the basic outline, it's time to make your bow truly pop. You can add color and outline to your drawings to give them character. * **Coloring:** Think about the purpose of your bow. Is it for a Christmas present, a birthday gift, or a decorative element? Choose colors that fit the mood. Bright reds and greens for Christmas, soft pastels for a baby shower, or bold primary colors for a playful look. * **Outlining:** A crisp outline can define your bow and make it stand out. Experiment with different line weights – a thicker line for the main shape, and thinner lines for internal details. * **Wrinkles and Folds:** To add realism, draw a bow wrinkle by drawing a small line from the knot toward the edge of the bow, about 1⁄2 in (1.3 cm). These small details suggest fabric and movement.Realistic Bow Drawing Techniques
Moving beyond simple outlines, drawing a realistic bow involves understanding how light interacts with its form. This is where shadows and color truly come into play. Learn how to draw a realistic bow with shadows and color for Christmas presents, packages or posters.Shadows and Depth
To give your bow drawing depth, consider your light source. Areas facing away from the light will be darker, while those facing it will be lighter. * **Shading:** Use varying degrees of pressure with your pencil or different shades of color to create gradients. The underside of the loops, where they meet the knot, will often be darker. * **Highlights:** A small, bright highlight on the most prominent part of the bow can make it appear shiny or silky. * **Cast Shadows:** Don't forget the shadow the bow casts on the surface it's resting on. This grounds your drawing and adds to its realism. You can download a free bow coloring page to practice these techniques before applying them to your own creations.Capturing Unique Bow Personalities
Bows can come in many shapes and forms, each with its own personality. This quirky drawing shows a banana wearing an elegant bow tie, giving it a fun and unique personality. The banana’s curved shape is simple and bold, while the bow tie adds an unexpected twist to the design. It looks like the banana is all dressed up for a special occasion, blending humor with creativity. This demonstrates that bow drawing isn't just about perfect realism; it's also about expression and creativity. You could also draw a simple wooden bow that would be used for archery. You could change the structure of it a bit, for example, by adding some more wood texture on the bow to highlight this part of the bow’s makeup. This shows how adaptable the basic principles of bow drawing are to different subjects and materials.The Science of Archery Bow Drawing
Beyond the artistic representation, "bow drawing" also refers to the fundamental action in archery: pulling the bowstring back to its full draw length. This is where the art and science of bow drawing truly merge, demanding not just strength but also precision, control, and an understanding of biomechanics. The art and science of bow drawing in archery are critical for accuracy, power, and consistency. It's not just about brute force; it's about a smooth and controlled movement, combining technique and focus. A well-executed draw is the foundation of good drawing in archery. It directly impacts arrow flight, grouping, and overall shooting performance. The bow itself is a marvel of engineering; for instance, some bows taper in thickness from 1/8 to 1/16 over its length, so when bent it forms a curve of continually changing radius. It works like a ship's curve, distributing stress efficiently. Understanding this mechanical aspect of the bow helps in appreciating the physical action required to draw it effectively.Mastering Your Archery Draw Form
Proper form is paramount in archery. It ensures consistency, prevents injury, and maximizes your efficiency. Learn the basics of drawing a bow with your back muscles, aligning your shoulders, and checking your form. This isn't just advice; it's a blueprint for success and safety. 1. **Stance and Grip:** Start with a stable stance, feet shoulder-width apart, perpendicular to the target. Your bow hand should have a relaxed grip, allowing the bow to pivot slightly. 2. **Pre-Draw:** Before initiating the full draw, raise the bow arm towards the target. This pre-draw phase helps engage the correct muscles from the outset. 3. **Engage Back Muscles:** The most crucial aspect of an efficient draw is to use your back muscles, specifically the rhomboids and latissimus dorsi. Think of pulling your shoulder blades together rather than just pulling with your arm. This transfers the load to larger, stronger muscle groups, reducing fatigue and improving stability. 4. **Shoulder Alignment:** Keep your bow shoulder down and relaxed, not hunched up towards your ear. Your drawing shoulder should also remain low and engaged. Proper shoulder alignment is key to preventing injury and maintaining a stable anchor point. 5. **Smooth and Controlled Movement:** The draw should be one continuous, fluid motion. Avoid jerky movements or "snapping" the string back. A smooth and controlled movement ensures consistent energy transfer to the arrow. 6. **Anchor Point:** As you draw, bring the string to a consistent anchor point on your face. This could be the corner of your mouth, under your chin, or alongside your jawbone. Consistency here is vital for accuracy. 7. **Alignment:** Once at full draw, ensure your bow arm, shoulders, and drawing arm form a straight line or a slightly angled "T" shape, depending on your shooting style. Checking your form regularly, perhaps with the help of a coach or mirror, is essential. 8. **Release Preparation:** Maintain tension in your back muscles even at full draw. This "holding" phase is brief but critical for a clean release. By focusing on these elements, you'll find out how to avoid common issues and improve your draw efficiency and accuracy, leading to better shooting performance.Common Issues and How to Avoid Them in Archery
Even experienced archers can fall into bad habits. Recognizing and correcting these common issues is vital for continuous improvement in bow drawing. * **"Chicken Wing" Elbow:** This occurs when the drawing elbow is too high and flares out, causing tension in the shoulder and an inconsistent release. * *Correction:* Focus on rotating your drawing arm so the elbow points directly away from the target, keeping it in line with the arrow. Engage your back muscles more to pull the string, rather than relying on arm strength. * **Creeping:** This is when the archer unconsciously pushes the bow forward or relaxes their drawing arm before the shot, reducing draw length and power. * *Correction:* Maintain constant back tension throughout the draw and hold. Practice holding at full draw for a few seconds to build muscle memory and strength. * **Target Panic:** While not directly a draw issue, anxiety about hitting the target can lead to rushing the draw and release. * *Correction:* Focus on the process, not just the outcome. Break down the shot into individual steps, and practice each step deliberately. Blind bale shooting (shooting at a close, blank target) can help re-establish good form without the pressure of aiming. * **Over-Drawing or Under-Drawing:** Inconsistent draw length leads to inconsistent arrow speed and trajectory. * *Correction:* Ensure your anchor point is always the same. Use visual cues on your bow or string, or have a coach confirm your full draw length. Regular practice, mindful repetition, and seeking feedback from experienced archers or coaches are the best ways to refine your bow drawing technique and achieve consistency.Creative Applications for Your Bow Drawings
Once you've honed your artistic bow drawing skills, the possibilities are endless. These simple yet elegant designs can be used in countless ways: * **Gifts and Packaging:** Adorn handmade cards, gift tags, or custom wrapping paper with your unique bow drawings. Learn how to draw a realistic bow with shadows and color for Christmas presents, packages or posters. * **Decorations:** Create festive banners, wall art, or even personalized stationery. * **Fashion Design:** Sketch bows for clothing designs, adding intricate details to dresses, blouses, or hair accessories. This tutorial is for beginners and children who want to draw a bow for clothing, decoration, or gifts. * **Digital Art and Crafts:** You can even vectorize your simple bow drawing to make laser cut earrings or a 3D paper bow. This opens up avenues for digital crafting and product design. * **Personal Expression:** Simply enjoy the meditative process of creating beautiful shapes. Pin it now, draw later – the inspiration is always there! In today’s drawing exercise, we are showing you how to draw a bow in three simple steps, emphasizing that even complex-looking designs can be broken down into manageable parts. Explore this content to find what you're looking for, whether it's a quick sketch or a detailed illustration.Beyond the Basics: Continuous Improvement
Whether you're an artist or an archer, the journey of bow drawing is one of continuous learning and refinement. For artists, keep experimenting with different styles of bows, from simple and fancy bows to adding new textures and perspectives. See examples of simple and fancy bows, and how to add color and outline to your drawings. For archers, constantly review your form, focusing on the foundation of good drawing: a smooth and controlled movement, combining technique and focus. Remember, practice is key. The more you draw, the more your hand-eye coordination improves. The more you practice your archery form, the more muscle memory you build. The search results for 'bow drawing' reveal a wealth of resources, with 48 relevant results about bow drawing, indicating the widespread interest and depth of this topic. There's always something new to learn, a new technique to master, or a new style to explore. By embracing both the artistic and athletic aspects of bow drawing, you unlock a deeper appreciation for precision, beauty, and control.The journey of mastering bow drawing, in all its forms, is incredibly rewarding. We hope this comprehensive guide has illuminated the path for you, whether your passion lies in creating stunning visual art or achieving perfect form on the archery range. What kind of bow will you draw next, or what aspect of your archery form will you refine? Share your thoughts and experiences in the comments below, or explore our other articles for more drawing tips and archery insights!
- Jd Martinez Kids
- Miss Circle R34
- Movierulz Ullu Web
- Xxbrits
- Hollie Strano And Bradley Forward Still Together
- Mms Instagram Viral
- Vegamovies 1080p 60fps
- Mar%C3%ADa Elvira Murillo
- Mika Lafuente Leaked
- Larry E Joseph
How to Draw a Bow · Art Projects for Kids
Easy How to Draw a Bow Tutorial and Bow Coloring Page

How to Draw a Christmas Bow - HelloArtsy
